Community Template v2
This documentation goes over everything needed for our Community Template v2. Information about the configs and setup is all stated below.
Please note that this guide is made as if you were installing the template onto a Linux VPS.
We do not recommended changing anything but the config.js, appData.js at any time.
Also do NOT edit the very bottom line of code in both files!
Installation
Once you have purchased the Community Template you will get access to download the website.
This website is build with ExpressJs on the NodeJs framework. If you are trying to host this, then you will need a VPS. Shared-Hosting will not work.
The guide from this point foward is assuming that your Linux VPS is already up, and you've logged-in on both terminal and SFTP.
Server Setup
Installing Nginx We will start by updating and install Nginx. Tip: Enter one command at a time when using a command-line interface.
sudo apt update
sudo apt install nginx
You will be prompted to press Y to install Nginx, do so.
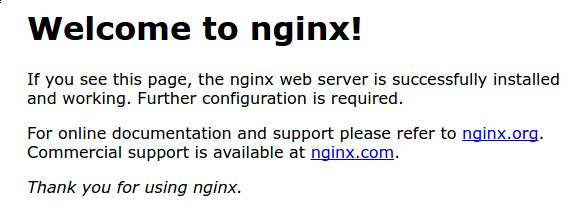
Once Nginx has finished installing, you will be able to visit the starter page at http://serverIP.
If you see the this, you have install Nginx successfully:

Installing Node.Js Next up, you will need to get Node.Js installed on your server to ensure that all of the website's system work properly. We will install and use Node Package Manager (NVM) for this.
Install NVM along with Node.Js with:
curl -o- https://raw.githubusercontent.com/nvm-sh/nvm/v0.39.1/install.sh | bash
nvm install 16.13.2
Installing Certbot (SSL) Last thing to get installed is Certbot. This will allow you to automatically issue and install SLL certificates onto your domains.
sudo apt install certbot python3-certbot-nginx
File Install
At least point, you will be doing somethings in SFTP & Terminal.
Nginx Configuration
Using your SFTP viewer, head to /etc/nginx/sites-available/default. This is the default config for sites with Nginx.
Delete all current content within the file and replace it with:
server {

  server_name example.com; # Change domain to your domain

  location / {
    proxy_pass http://localhost:3000; # Change the port if needed.
    proxy_http_version 1.1;
    proxy_set_header Upgrade $http_upgrade;
    proxy_set_header Connection 'upgrade';
    proxy_set_header Host $host;
    proxy_cache_bypass $http_upgrade;
    proxy_set_header X-Real-IP $remote_addr;
  }
}
Once that is updated and saved, do the following:
sudo systemctl restart nginx
SSL Certificate Creation
To issue the certificate for Nginx run the following command. Make sure to replace example.com with your domain.
sudo certbot --nginx -d example.com
You may be asked to provide details such as an email, do so. (That info is private.) There will be a redirect method selection, pick option 2. Now that the certificate is officially issued, assuming no errors showed up for you, we want to make it renew itself.
sudo certbot renew --dry-run
Installing Site Files
This should be the easiest part of the install.
Using your SFTP application, head to the /home directory. Once there, create a directory for the website, communitytemplate.
Then, simply drag all the site's files into that folder.
Configuring the Site
All information related to content within the config.js and appData.js is listed as comments within the files. Please use those, as they explain most everything. Also note, that some things without comments or such are quite simple, so do not over think things.
Keep the same formatting to items. If it is a string, array, object, etc, leave it as such. Do NOT try to make a string an array or anything of the nature. Please contact us via a discord ticket if you have any issues or concerns.
Resources
Below are all the configs used for this site. A default version is provided incase you break something, want to start over, or need to look at the original configs.