Shopify Application Setup
This guide will walk you through creating a custom app in your Shopify store's admin panel and obtaining your API credentials for Shopify Bot.
Never share your Shopify API credentials with anyone! They provide access to your store data and must be kept secure.
Before we being, navigate to your Shopify admin at https://admin.shopify.com and make sure the correct store is selected.
Enable / Access Custom App Development
Before you can create a custom app, you need to enable custom app development in your store:
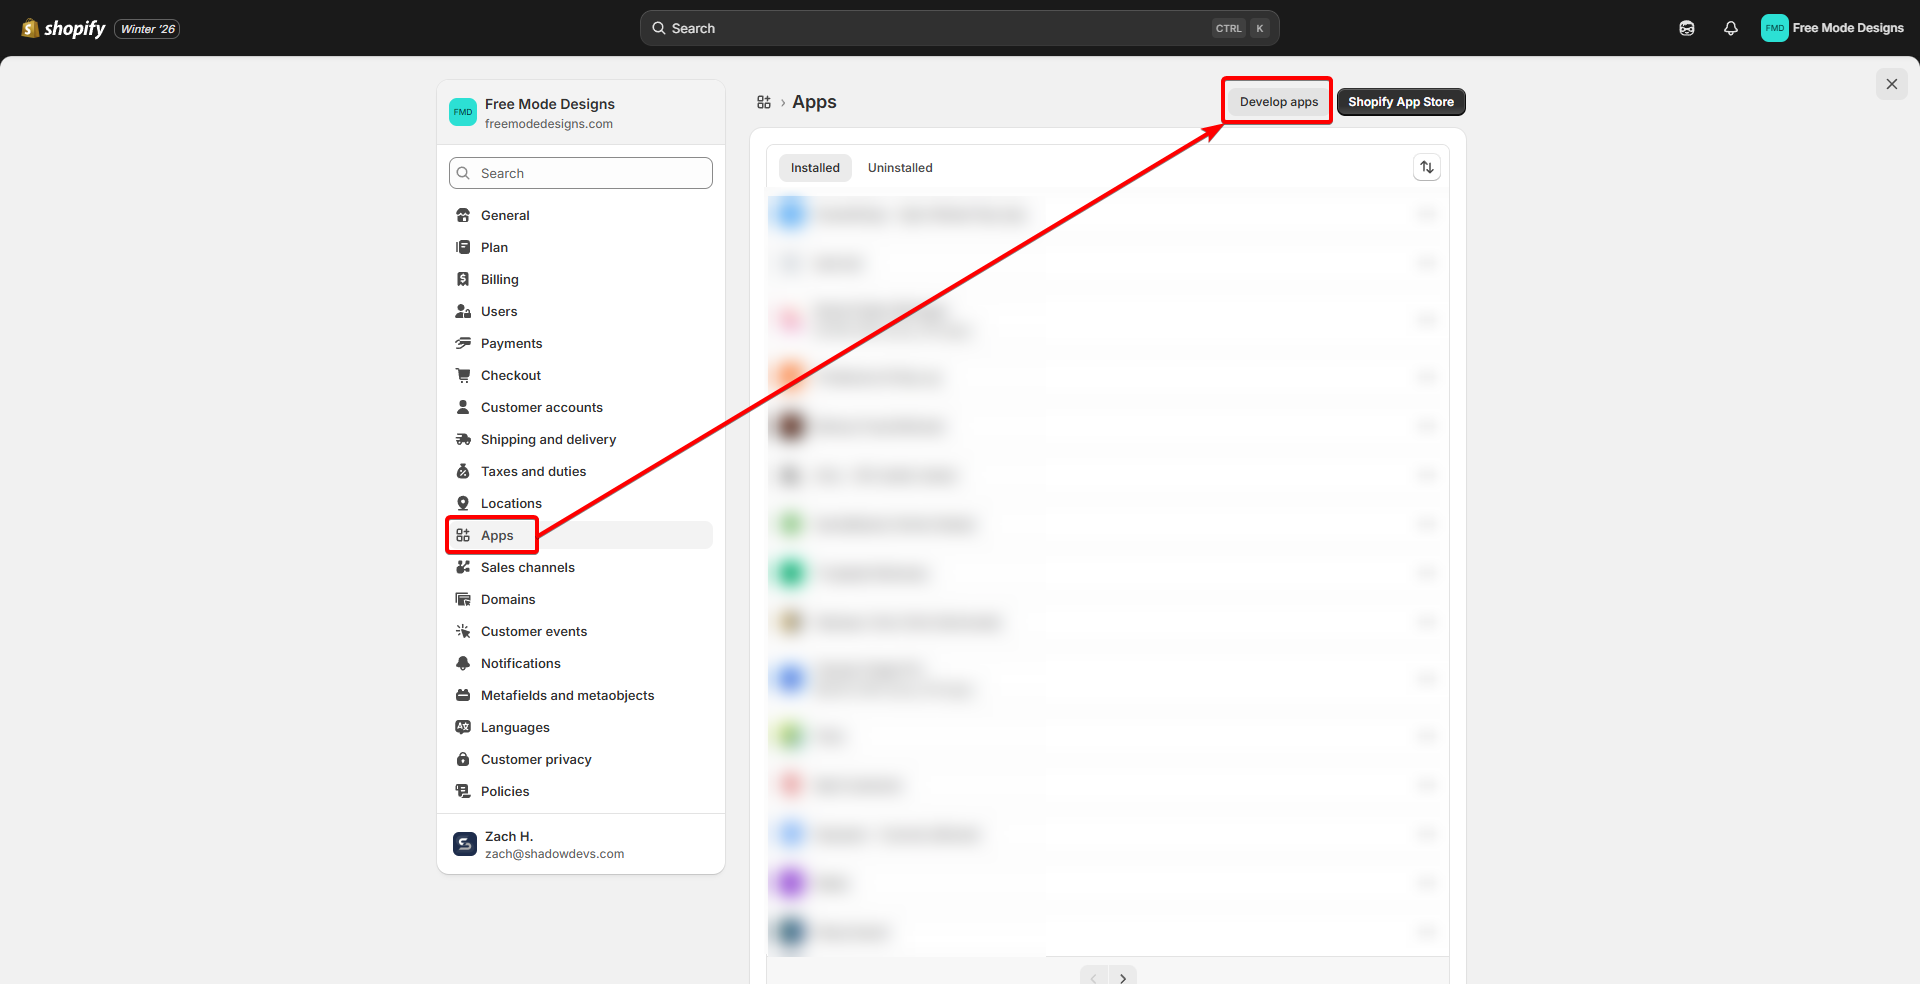
- In your store admin, click on "Settings" in the bottom left corner
- Click on "Apps"
- Click "Develop apps"
- If this is your first time, you'll see a prompt to "Allow custom app development", allow it
Create a Custom App
Now you'll create a custom app to get your API credentials:
- Click "Build apps in Dev Dashboard" button
- Click "Create an app" button
- Enter your app name (e.g., "Shopify Bot") in "Start from Dev Dashboard" section
- Now we will configure the release:
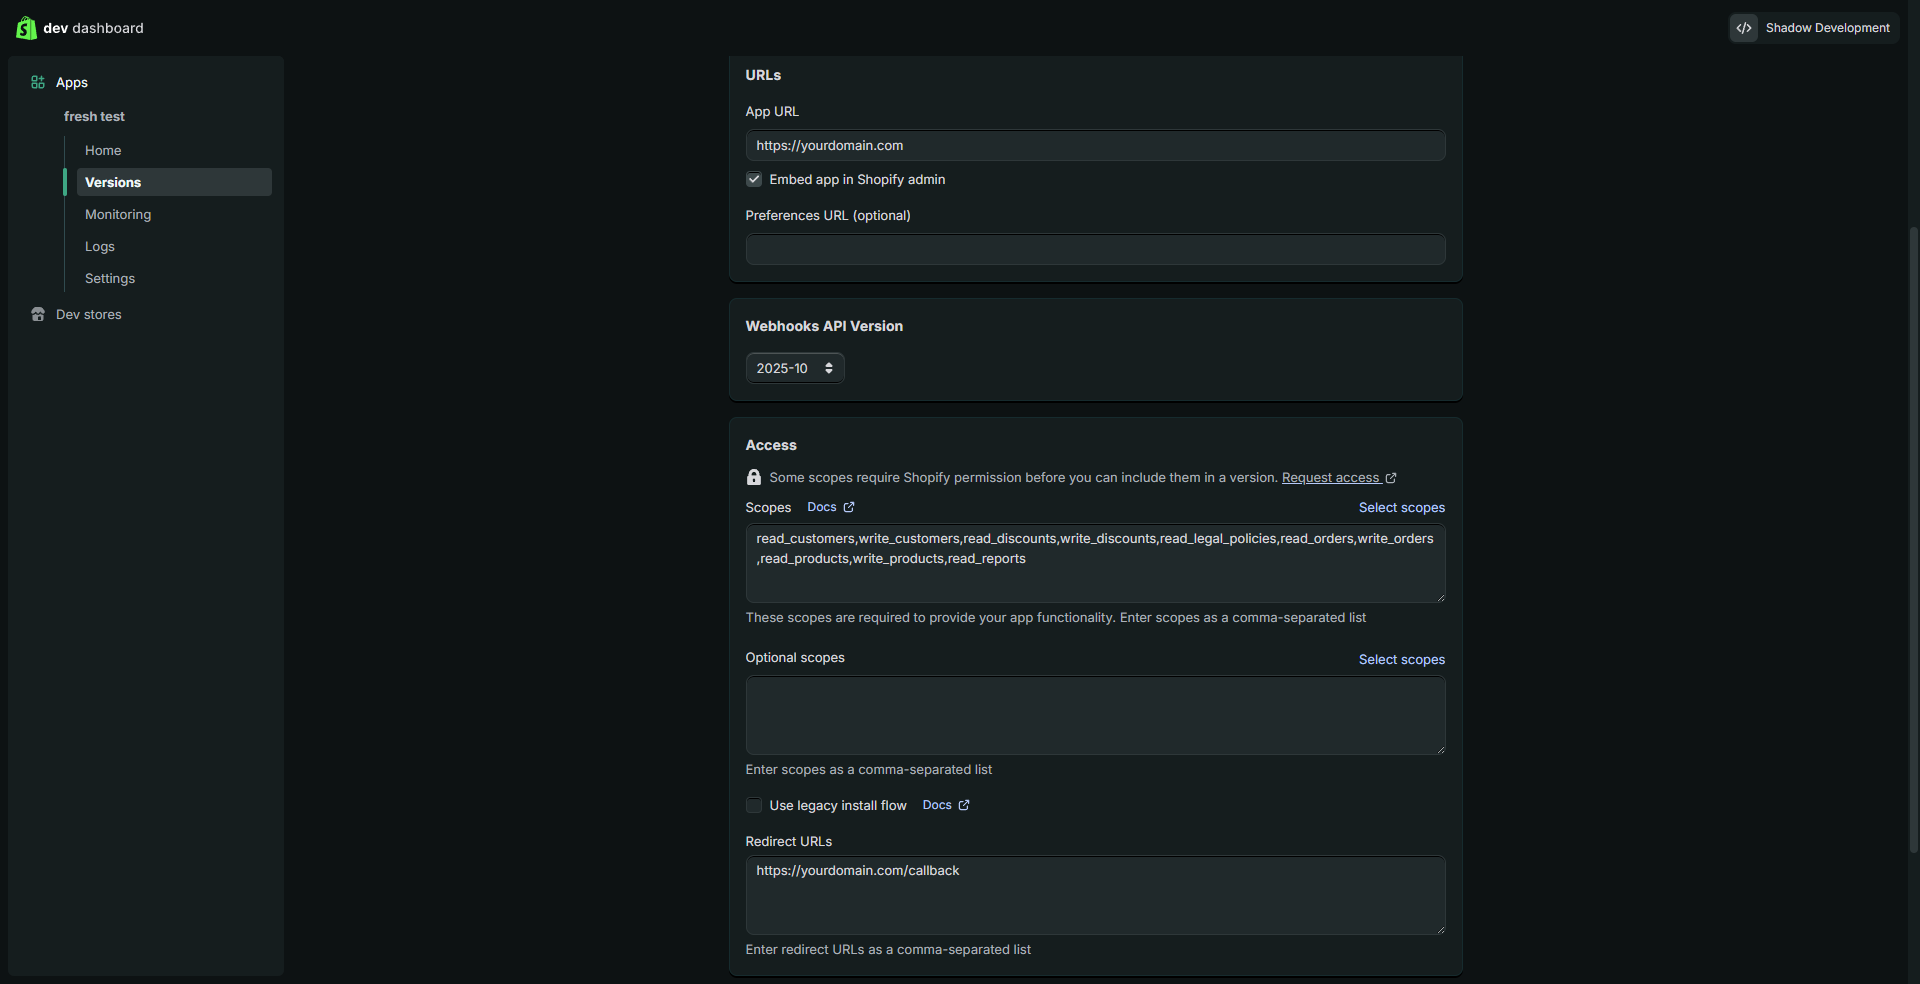
Step 1: Application URLs & API Version
- The "App URL" should be the base for your app's web server, ie:
https://yourdomain.com. (Set in your.env) - In "Redirects URLs" put:
https://yourdomain.com/callback - Set the "Webhooks API Version" to
2025-10or later
Step 2: Access Scopes
- In the Access section, under Scopes you will paste:
read_customers,write_customers,read_discounts,write_discounts,read_legal_policies,read_orders,write_orders,read_products,write_products,read_reports
Required Scopes Details
Products:
read_products- Read products, variants, and collectionswrite_products- Modify products, variants, and collections
Orders:
read_orders- Read orders, transactions, and fulfillmentswrite_orders- Modify orders, transactions, and fulfillments
Customers:
read_customers- Read customer datawrite_customers- Modify customer data
Discounts:
read_discounts- Read discount informationwrite_discounts- Create and modify discounts
Legal & Reporting:
read_legal_policies- Read store legal policiesread_reports- Read analytics and reports data
- Once you've done that, you can click "Release"
Installing the App
- Head to the "Home" tab
- Click "Install app" in the top right
- Click "Install"
If you ever change your domain or we add more scopes, then you will have to install the app into your store again.
API Credentials
- Navigate to the "Settings" tab
- At the top you will see "Credentials"
- Copy: Client ID and save it in your
.envasSHOPIFY_CLIENT_ID - Copy: Secret and save it in your
.envasSHOPIFY_CLIENT_SECRET
Make sure to copy and save it securely, and NEVER share this token! It will give people access to your store/customer data.

Setting Up Webhooks (Optional)
Webhooks allow Shopify to notify your bot when customer updates occur. This can help with account linking if an email is changed.
This is all done on your Shopify admin page, not the dev dashboard.
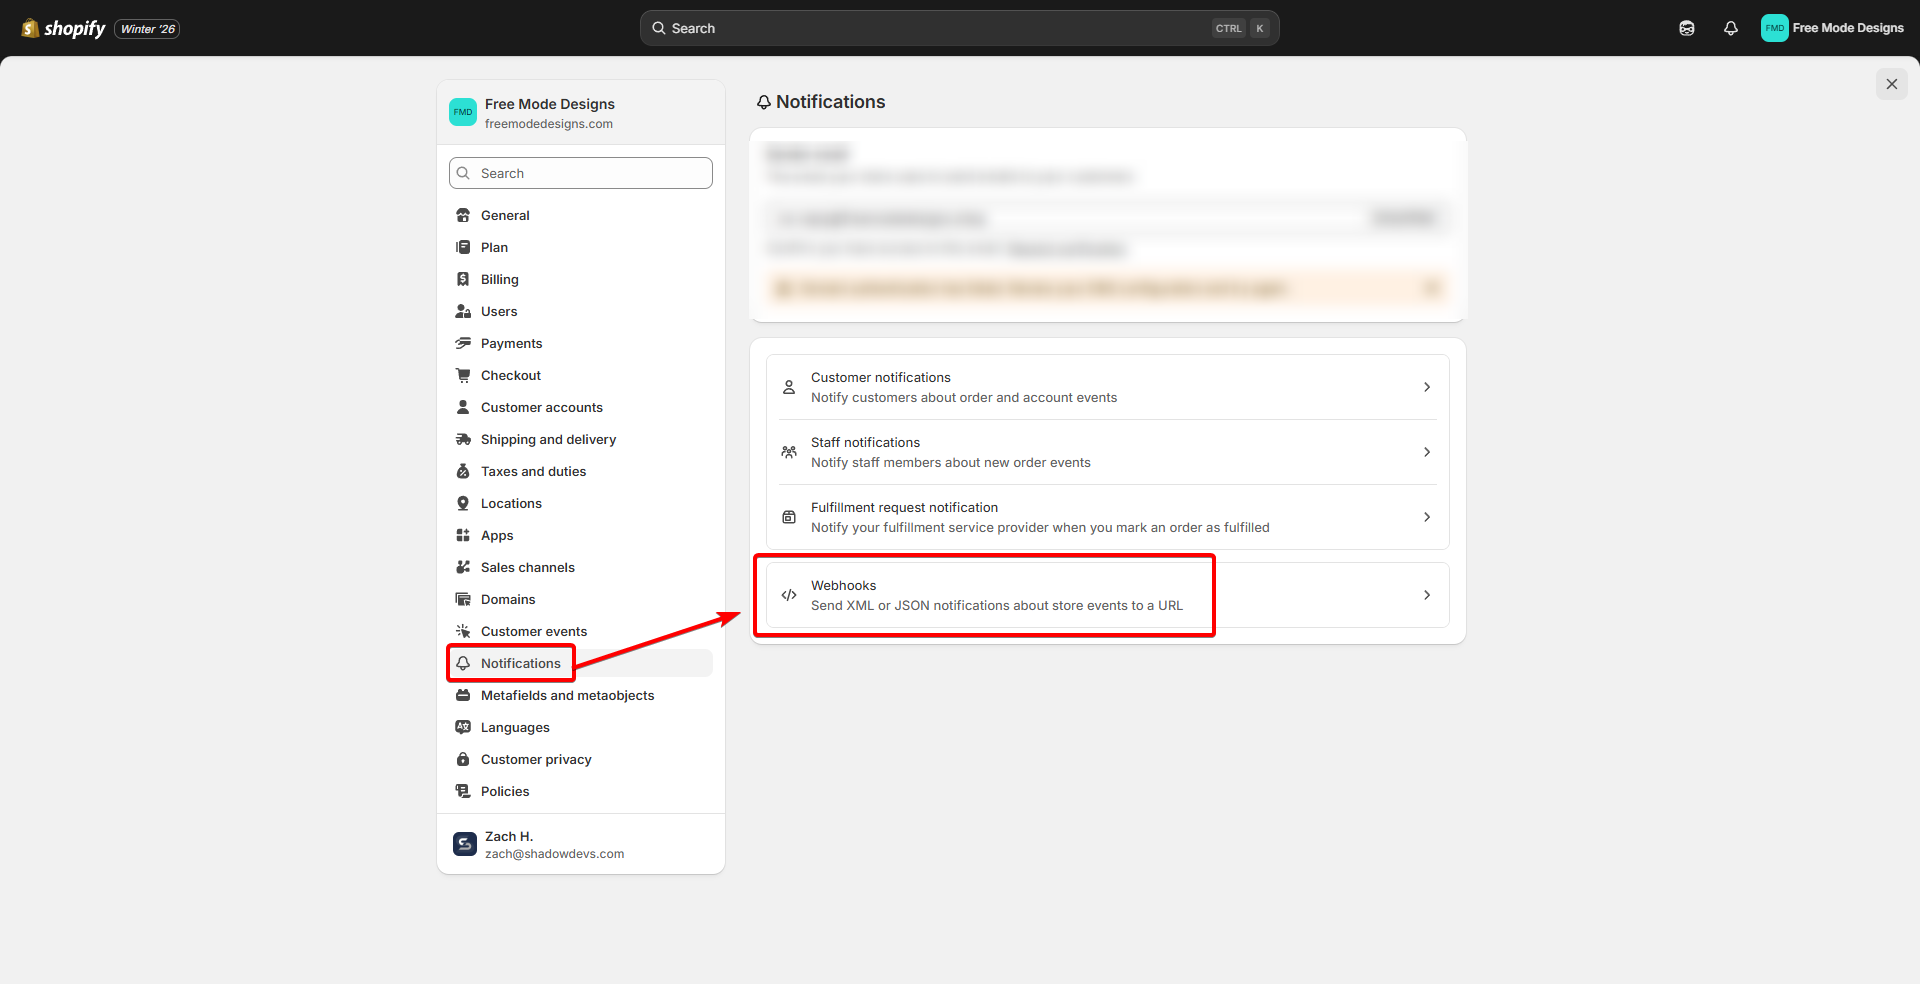
- Navigate to "Notification"
- Click "Webhooks"
- Click "Create webhook"
- Set the Event to "Customer update" and Format to "JSON"
- Set the URL to
https://yourdomain.com/webhook/customers/update - Webhook API Version should be
2026-01 (Latest)or later (Latest is normally best)
- You should now see a "Your webhooks will be signed with" followed by a long string of text, copy that and set it as your
SHOPIFY_WEBHOOK_SECRETin your.env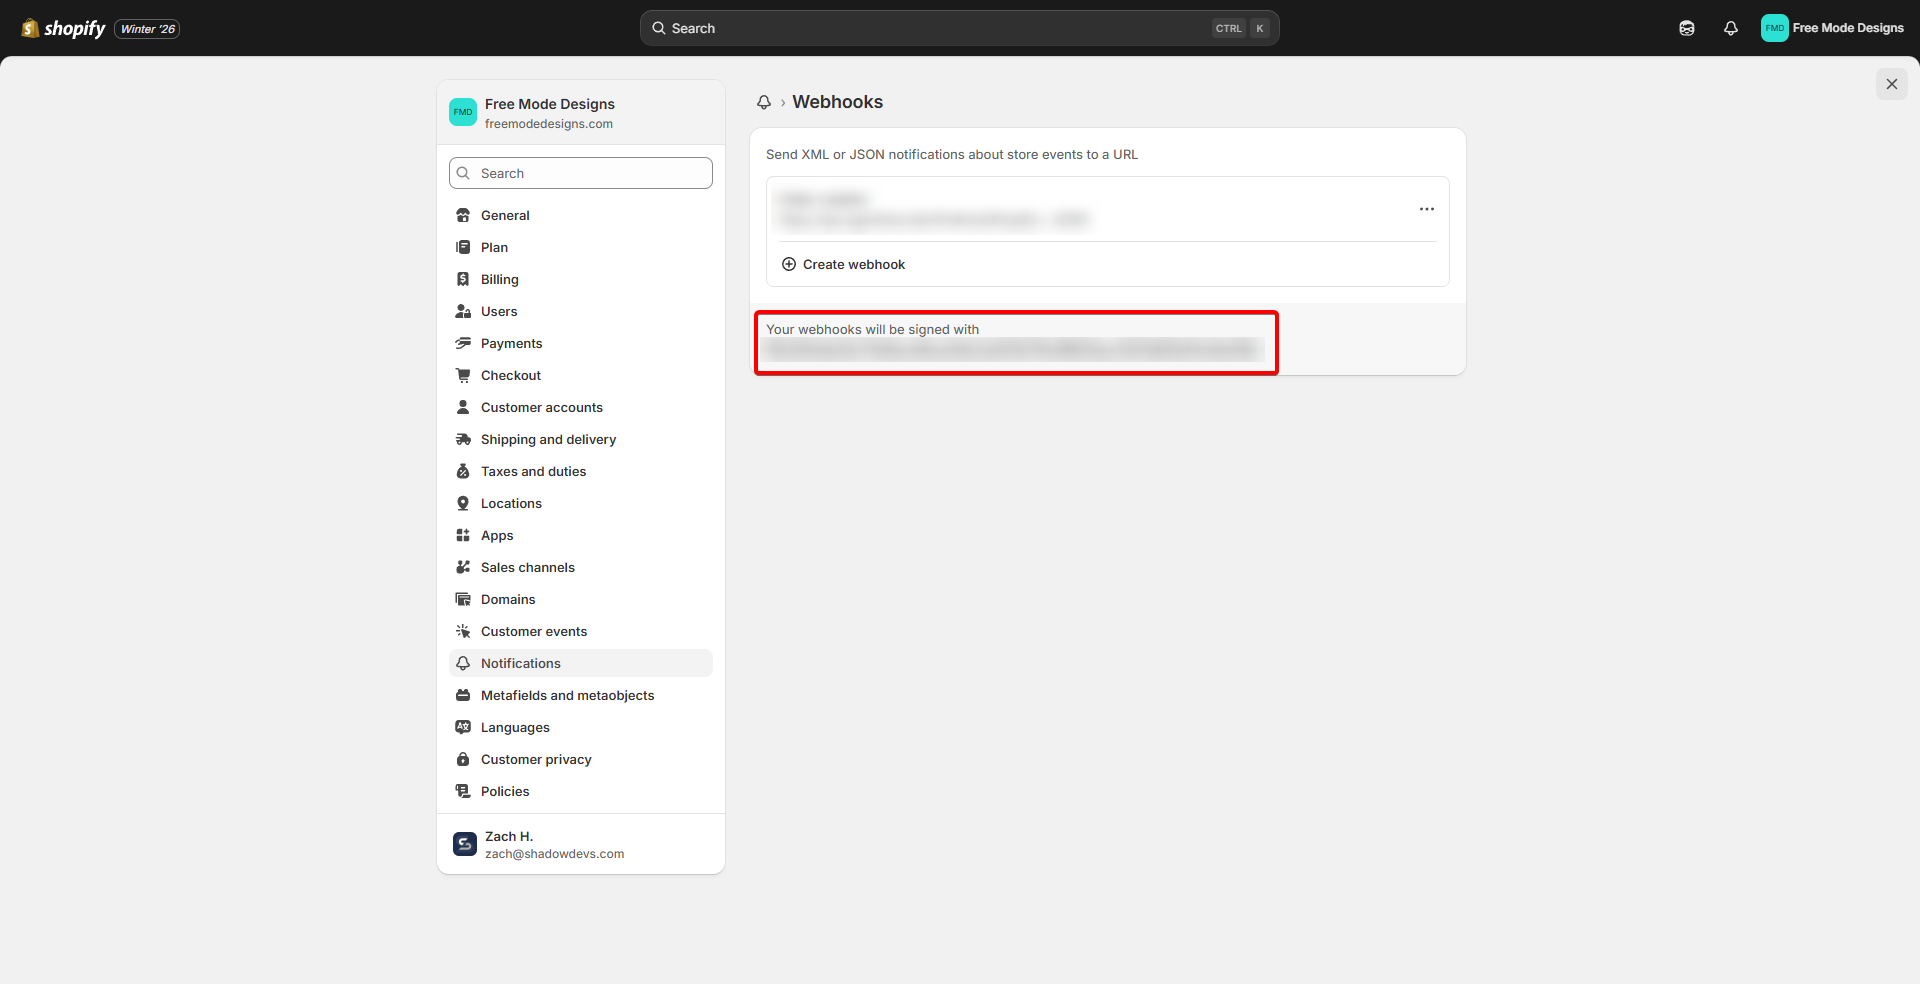
Troubleshooting
"API key is invalid"
- Double-check that you copied the API key correctly
- Ensure there are no extra spaces or characters
"Permission denied" errors
- Check that you've granted the necessary API scopes
- You may need to add additional scopes and reinstall the app
Webhooks not working
- Verify your webhook URL is accessible from the internet
- Check that your SSL certificate is valid
- Ensure the webhook secret matches in both Shopify and your
.envfile